Avoiding sinkholes in molded plastic parts
By ProtoLabs
CAD/CAM/CAE 3D Dojo injection molding plastic design Proto Labs ProtomoldDesign tips from Protomold help diminish the effects of shrinkage in injected molded parts.
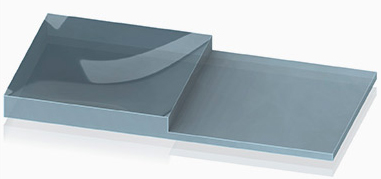
We’ve seen a lot of news about sinkholes lately; natural erosion, mining, aquifer depletion or similar activities remove the substrate and leave an unsupported surface that eventually collapses. A similar thing can happen on a smaller scale to molded plastic parts resulting in sink, which at best is unsightly and at worst can affect function (see Figure 1). In most cases of sink, the outside of the part cools and forms a skin while resin in the interior is still liquid; then as the inside cools and shrinks the surface is drawn inward. In the worst cases the surface can actually break, leaving a hole.
Like most materials, resin expands when heated and contracts as it cools. In its liquid form it can also be compacted under pressure, returning to normal volume when the pressure is released. Since injection molding involves both heat and pressure, molds are designed to accommodate this phenomenon, so after its expansions and contractions the finished part is as close as possible to its designed dimensions. But mold design has its limitations, and the part’s designer plays an essential role in preventing problems.
All resins shrink as they cool, although by varying amounts. Resins like ABS, polycarbonate, and blends of the two have low shrink coefficients. Nylon, HDPE, and acetal have higher shrink coefficients and are more prone to sink. But whatever the coefficient, the total amount of shrinkage for any particular resin is proportional to the dimensions of the part. That makes shrinkage relatively easy to adjust for when design rules are followed and wall thicknesses are consistent. Note: shrink can also vary with the direction of resin flow within the mold, but this is typically addressed by gate placement.
Your first indication of a potential sink problem may come fromProtoQuote, which flags overly thick areas in blinking dark blue accompanied by a “thick area warning.” In severe cases you will be notified that a change is required; in less severe cases the choice is yours. Some factors that can guide your decision are as follows:
1. Shrink analysis is done before ProtoQuote is aware of what resin you are committing to. Be aware that the ProtoQuote is biased toward caution. If you are planning to use a resin with low shrink coefficient, say 0.004 to 0.006 inches of shrink per inch, there may not be a significant problem.
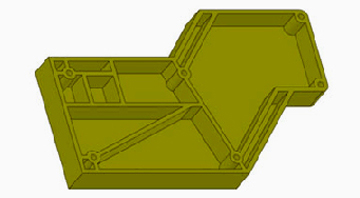
2. In your design you can reduce or eliminate sink by thinning or flattening thick areas or coring them out to maintain the desired shape while eliminating thick areas (see Figure 2).

Figure 2: Reducing excessive wall thickness on the “backside” using a coring design helps to eliminate sink on the “front” surface.
3. In some cases, sink results not from thick walls but from theintersection of features. For example, a rib that intersects a wall can create a thick area even if both features are of “acceptable” thickness. The basic rule is that the rib should be no more than 40–60% of the thickness of the wall it intersects.
4. Similarly, a boss that extends from a wall can be a thick area and cause sink. The usual solution is to move the boss away from the wall and connect it to the wall with a rib of suitable size. You can reduce sink in the wall on which the boss stands by treating the walls of the boss as ribs and keeping them to 40–60% of wall thickness as well.
5. Other features that are attached to walls, such as clips, can cause sink. This can sometimes be solved by replacing a large clip with several small ones.
6. You can reduce the natural shrink coefficient of a resin by adding less shrink-prone fillers such as glass or minerals. You would, of course, need to make sure that this does not affect critical characteristics of the resin or introduce warp issues.
ProtoQuote, your own design knowledge, and help from Proto Labs’ Customer Service Engineers can head off many potential problems, but sink may still occasionally occur. But spotting and correcting such problems is, after all, what prototyping is for, and as long as you identify the problem before committing to production you are ahead of the game.
www.protomold.com
For more design best practices, check out protomolds’ Design Tips Newsletter where this article first appeared: www.protomold.com/DesignTips.aspx

