
Establishing and editing the origin of ordinate dimensions in AutoCAD
By By John Hackney, IMAGINiT Technologies
CAD/CAM/CAE General AutoCAD Autodesk Imaginit Technologies John HackneyRe-defining the User Coordinate System (UCS) of a drawing removes the guesswork from ordinate dimensions.
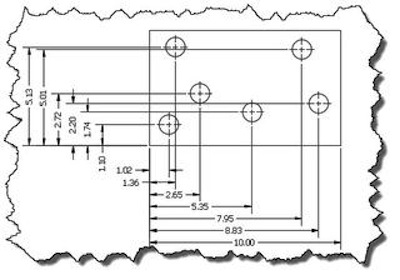
AutoCAD ordinate dimensions are a wonderful method of reducing drawing clutter when dimensioning numerous features in a small area. The below drawing of a small plate with 6 holes, one dimensioned with linear dimensions, the other using ordinate dimensions illustrates this.
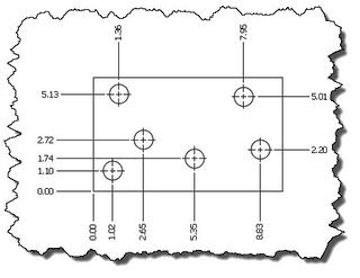
This article is about one of the problems designers face when using ordinate dimensions, which is placing the origin point for the dimension set. When I start dimensioning my drawing the first ordinate dimension placed is obviously not related to the part.

So how do you move the ordinate dimension origin to the lower left corner the block? The answer is to re-define the User Coordinate System (UCS) of the drawing. When an AutoCAD drawing is created, the UCS is defined automatically in model space and you probably will see the UCS icon indicating its location. By the way, I am using 2D AutoCAD in this example, 3D UCS also exist but that is another topic.
It is customary to have AutoCAD display the UCS icon at the origin of the drawing and I wanted to make sure it has not been changed. There are two methods to verify / set this functionality. One of these is to select the diagonal arrow on the Coordinates panel under the Visualize tab. If you do not see the Visualize tab, right click on the ribbon and select Show Tabs to make it visible.
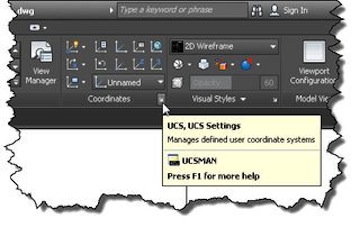
In the dialog box, verify that the check mark is beside “Display at UCS origin point” entry.

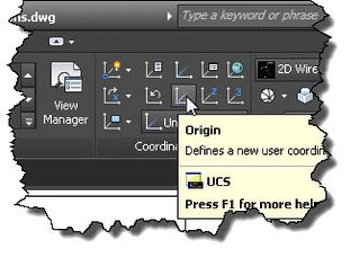
Before you begin using ordinate dimensions, you need to establish where the drawing UCS origin is located. There are a number of ways to accomplish this but the easiest is to use the “UCS” command or select the icon shown below on the Coordinates panel.
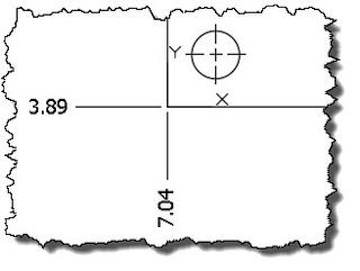
Using your Object Snaps, place the origin on the lower left hand corner of the plate. This moved the UCS origin but my two placed ordinate dimensions do not update.
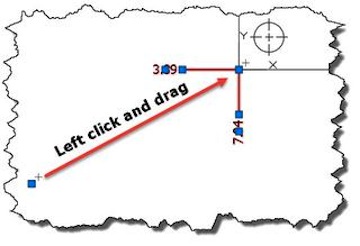
This is because each set of ordinate dimensions are related to the active UCS origin at the time of their placement. Since the two ordinate dimensions were placed before I moved the UCS origin, they are measuring from its previous location. It is easy to update these dimensions simply by selecting them and by dragging their UCS origin grip to the lower left corner of the block. The selected ordinate dimensions update immediately.
You could drag the UCS origin to any point on your model depending on your design. The main point to take away from this procedure is to set you UCS origin BEFORE you start placing ordinate dimensions.
For more Inventor tips and tricks, check out IMAGINiT Manufacturing Solutions Blog.
John Hackney is an IMAGINiT Technologies Mechanical Application Engineer with 25 years design exprienece in various manufacturing disciplines including converting and high speed pick and place machinery.