Overriding Sketch Constraints in Alibre
By Alibre Team
CAD/CAM/CAE 3D Dojo Alibre CADHow to automatically apply sketch constraints when sketching in Alibre Design.
When sketching in Alibre Design there are many different sketch constraints that can be automatically applied saving you the time of manually entering them. The sketch constraint can be enabled or disabled, overridden on a case-by-case basis, or deleted after they have been applied.
Overview of Sketch Constraints
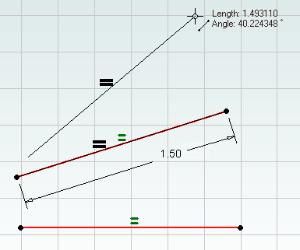
Sketch constraints are used to help limit the degrees of freedom (DOF) in sketches and are often used in place of dimensions. For example, if two lines are sketched that are the same length then an Equal sketch constraint can be used so only a single linear dimension is needed to define both of their lengths. In the particular case shown below, a green Equal sketch constraint is visible next to each line. These constraint symbols are easy to understand and provide less clutter than a lot of duplicate dimensions. Since these lines are the same length, when the 1.50-inch dimension is changed then both lines will change.
Enabling and Disabling Sketch Constraints
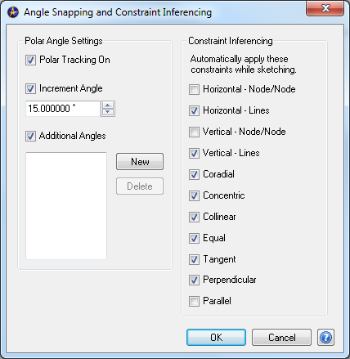
Depending upon your individual preferences, the default behavior for sketch constraints can be changed for all part files. While in 2D Sketch mode, press the Alt key on the keyboard and from the main menu go to Sketch > Snap and Constraint Settings. In the dialog box you can choose which sketch constraints you want to be automatically applied while sketching.
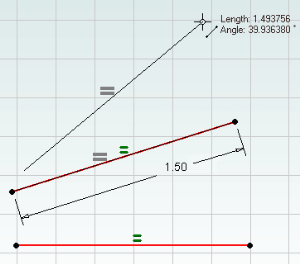
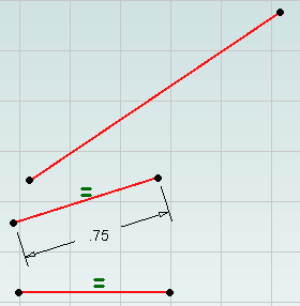
Before clicking to place a sketch figure you may see a slightly different colored preview of the sketch constraints next to the figures. If the sketch constraint option is enabled in the above dialog box then a darker sketch constraint will be shown. When the mouse is clicked the sketch constraint will automatically be applied and will turn green. If the option is disabled in the dialog box then the preview of the sketch constraint will be gray. If you click to place the sketch figure, the sketch constraint will be applied, in this case the new line will be 1.50”, but the length of this line will be independent of the original line. The Equal sketch constraint will be temporarily applied but it will not be retained. If you change the 1.50-inch dimension then only the first two lines will change, the third line will stay at its independent length.
Overriding Sketch Constraints
When placing a sketch figure, if it is close to one of the sketch constraint options then the mouse cursor will snap and show a preview of the results. Sometimes this is not wanted. For example, if you are sketching a line and it is within a couple degrees of being vertical then the line will snap to the vertical orientation and the Vertical sketch constraint will appear next to the line. If you know that you do not want it to be constrained vertically, then while moving the mouse hold both the Ctrl and Shift keys. When the left mouse button is clicked to place the sketch figure this combination of keys will override and not place the sketch constraint.
Deleting Sketch constraints
What happens if a sketch constraint has been applied and you later decide that you no longer need it? While in Select mode, move the mouse cursor over the sketch constraint symbol in the workspace and a couple of things happen. As shown below with the Tangent sketch constraint, the affected sketch items will highlight blue and the sketch constraint symbol will appear in the mouse cursor. At this point you can either right click on the symbol and select Delete from the pop-up menu or press Delete on the keyboard. The sketch figures will remain at their current location but will now be independent of each other.
For more Alibre tips, check out the company’s monthly newsletter.
www.alibre.com


