Clean-Up Your Local Vault Workspace
By John Hackney
CAD/CAM/CAE Autodesk CAD Imaginit Technologies John HackneyKeeping local copies of design files in check in Autodesk Vault.
When it comes to working on a computer, we all tend to be a little lax in keep our hard drive clean and organized. One of the best ways to maintain your local workspace is to use the “Close files and delete working copies” option as you are checking in files. This option will delete all files from your local workspace after a successful check in.
If you do not use this tool, your local workspace can become bloated and disorganized. Also, after time passes, we do not remember the status of files and are afraid to delete anything so the problem escalates.
Vault Workgroup and above offers a tool to help you manage your workspace from inside the Vault client. I would like to offer a word of caution before I get into the functionality of the tool. If you are placing files in your local workspace that you do not plan to check into the Vault, use caution if you use this tool. As I mentioned, it is a clean-up tool so files not in the Vault that become dated beyond the criteria of this Vault tool, will be lost! With that warning out of the way, we can explore a very good tool to maintain a clean and organized local workspace.
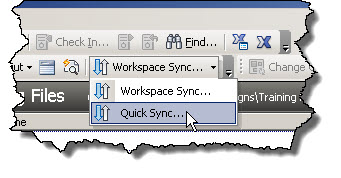
The tool is located just above the Main Panel in the Vault Client. There are two tools on the same icon, Workspace Sync and Quick Sync, which are selected with the small dropdown arrow to the right hand side of the tool. The first time you use the tool make sure to select Workspace Sync in order to configure the process. The Quick Sync tool is a quick execution of current settings, which you will use later.
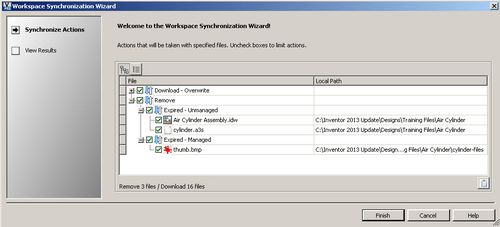
After selecting the Workspace Sync tool the process of analyzing your local workspace will begin. Depending on how cluttered your local workspace it, the process may take a few minutes or a few seconds. After the process is complete you will be presented with a list of files. The list is a bit overwhelming the first time you run the tool but we are here to configure the process. Find the Settings icon in the lower right hand corner of the dialog box and select it. Make sure at this point you do not select the Finish icon.
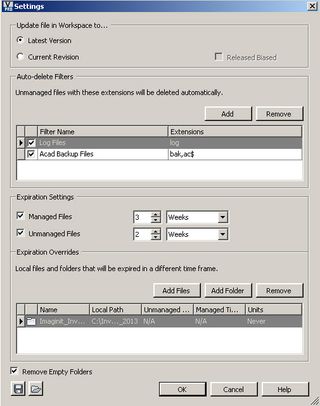
The Setting dialog box has a number of options which we will explore from the top to the bottom.
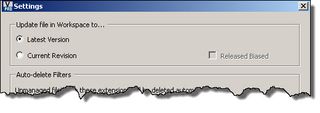
The first setting is which type of files you desire to be written from the Vault to the local workspace if local workspace synchronization is required. This process will not happen very often but when it does do you want the Latest Version of the files or the Current Revision to be copied from the Vault to your local workspace. This could be important if you have been working on a set of files after a revision was created. If you chose Current Revision you also have the option to have the revision selected that is related to the last released lifecycle state by checking the Released Biased box.
The next section is the Auto-delete Filters. In his box you can add or remove file extensions of files in your local workspace that you would like to delete automatically during Workspace Sync. It is important to note that these files have to be unmanaged files. Managed files are those files in your local workspace that have been checked into the Vault and are being managed by the Vault. Unmanaged files are not in the Vault and therefore are not managed. We all will accumulate these kinds of files which we want to always delete so enter their extensions here. Be sure to place a checkmark beside the extension once created to make it active.
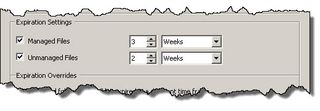
The next section is used to select the time frame to apply to managed and unmanaged files before the Workspace Sync tool deletes them from the local workspace. For example the setting below indicates that all files in the Vault (Managed) will be deleted from the local workspace when they become 3 weeks older than the current system date. The files not in the Vault (Unmanaged) will be deleted from the local workspace when they become 2 weeks older than the current system date. There are two options for the time period, weeks or days, selectable by the drop down arrow. You can also select a range of 1 to 15 for the number of days or weeks for the Managed files and a range of 0 to 15 for the unmanaged files.
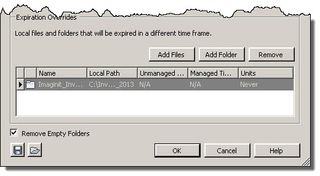
The last section allows you to add files or folders in your local workspace that you would like to configure different expiration dates than specified in the previous section. You have the same selection of time periods as in the previous section and also the ability to exclude files and folders from the rules completely by selecting Never as shown below. In the lower left hand corner of the dialog box you can select the Remove Empty Folders option. This setting will tell the Workspace Sync tool to remove all folders that become empty during the synchronization process.
You can also export and import your settings to share with others or use at a future date to change your settings. Click OK to finish the configuration.
The file list will update and the list will display files with different synchronization criteria. You may see Download – Overwrite for files that are in the Vault and your local workspace and the local copy is out of date. You will also see a Remove list listing all files that will be deleted from your local workspace according to your settings above. READ THEM CARFULLY and return to the Settings if adjustments need to be made. If you have select files or folders you wish to remove from the synchronization process, you can remove the check marks accordingly.
Before you hit the Finish button, I suggest you take a moment to empty your Windows Recycle Bin. If during the Workspace Sync process you find files you needed were deleted, it will be easy to restore them. Select Finish to start the process.
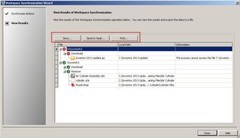
After the Workspace Sync is finished, you will be shown a status dialog showing the results. You can Save, Send to Vault, or Print the results.
The Quick Sync command bypasses the dialog box showing the files to be synchronized and the ability to select the Setting button. It should be used for day to day work AFTER you have configured the process and feel comfortable with the process. Take note, it becomes the default command after you use it once.
A clean and productive Vault local workspace is in your future.
http://blogs.rand.com/manufacturing/
This article originally appeared on IMAGINiT’s Manufacturing Solutions blog.
 John Hackney has 25 years of experience in the manufacturing industries including experience in Converting Machinery, High Speed Pick and Place, Packaging Machinery, and Waste Incineration Equipment. He has served as CAD Manager, Designer, Quality Control Checker, and Engineering Manager during his manufacturing years. John has a background in Education having taught on both in secondary education and community college level courses. Subjects taught were Industrial Technology, Drafting and Design and various CAD applications.


