How to format Parts Lists in Solid Edge ST2+
By John Pearson, Senior Technical Trainer and Application Specialist, Designfusion
CAD/CAM/CAE CAD Design Fusion John Pearson Solid EdgeTake control of how parts list layout with Solid Edge’s new Parts List architecture.
In Solid Edge ST2, Parts Lists were redesigned to take advantage of the user table architecture. In this first release of this new Parts List command, just under 250 customer requests were implemented, and many more have been added in ST3 and ST4. Below is a list of highlights followed by some example of the new capabilities.
The new Parts List architecture allows you to:
- Edit Item Numbers from Parts List, not just from balloons
- Combine Multiple Properties in Single Column
- Comments Columns – User defined text
- Split Parts List among Multiple Sheets
- Sort on Hidden Columns
- Manual Reorder Columns and Rows
- Resize Columns in Graphic Display
- Placement via cursor
- Title/Footer
- Display an exploded list of the BOM
- Display level based item numbers with the exploded list
- Indent any column to aid in the showing of sub-assemblies
- Derive item number from the assembly
- Display Mass property as Mass of single item, and Mass of total occurrences of the item
- Frame data display enhanced to allow for distinction of frames based on cut length, mass, and miter
- Align and control style of table titles
- Control column headers
- Merge column headers
- Rotate column headers
- Turn on Cell Aspect Ratio adjustment
- Format the font for any cell
- Override disabled cells
- Insert user defined rows
- Merge vertical cells with same value
- Plus more ….
Examples
The following are just a few examples of some of the new capabilities in the Parts List architecture.
Example 1: How to add a title to the Parts List
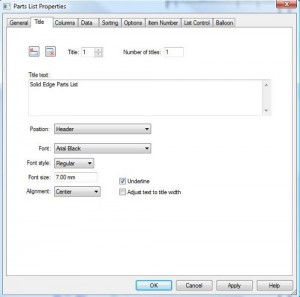
To add a title to your Parts List you must first go to the “Title” tab and click on the Add Title icon.
In the Title text field, type the title that you wish to use – for example Solid Edge Parts List.
You can also control how the title is formatted by adjusting the following settings:
Position – Specifies the position for the title within the table. You can place a title at the top of the table (Header option), at the bottom (Footer option), and in ‘Both’ locations. Select ‘Neither’ from the list if you do not want to use the title in the table.
Font – Specifies the font to apply to the currently selected table title. All installed fonts are available.
Font style – Specifies the font style to apply to the currently selected table title. The options are Regular, Bold, Italic, and Bold Italic.
Font size – Specifies the text size of the currently selected table title.
Alignment – Adjusts the horizontal alignment of the currently selected table title text. The options are Left, Center, and Right. The default is for text to be centered.
Underline – Applies underline to the currently selected table title text.
Adjust text to title width – When checked, automatically adjusts the aspect ratio of the title text when the length of the text exceeds the cell width. Changing the aspect ratio only changes the text width, not its height. The effect of selecting this check box is to shorten the text string to fit the column width; text is never lengthened to fit the column width.
Use this option to prevent text from wrapping within a cell in a title block.
For this example, I defined the following settings:
Font = Arial Black
Font size = 7.00mm
Toggle on Underline
Below is how this would appear on my Parts List.
Example 2: How to modify individual columns
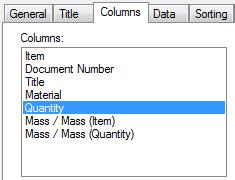
In this example, I wish to rotate the header of the “Quantity” column and merge any cells that have the same quantity, while maintaining my item number order. To do this, I first go to the Columns tab and then select the Column I want to modify – for example “Quantity”.
To rotate the header, select the “Format Cells” button, beneath the header “Text:” field, and change the Orientation to Rotated
I then toggle on “Adjust text to column width” and hit OK.
Notice that when this is applied, the header is rotated and column width is adjusted appropriately.
To merge like cells, toggle on “Merge vertical cells with same value”
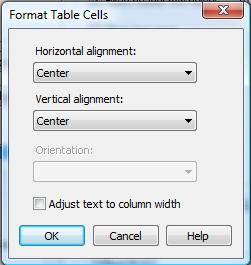
If you want to center the cell’s data, click the adjacent “Format Cells” button and set both Horizontal and Vertical alignment to “Center” and click OK.
Below is an example of how these changes would appear when applied.
Example 3: Creating indented item numbers
In this example, I want to create an exploded BOM and have the Item Numbers indented to illustrate the parts belonging to the sub-assemblies. To do this, I select the Columns tab. Next, I select the Item Number, from the Columns list, and click on the “Format Cells” button. Under the Horizontal alignment, I select Indent.
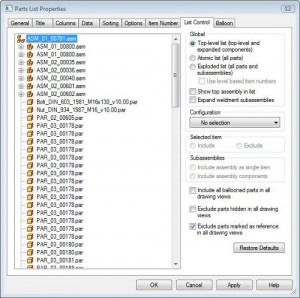
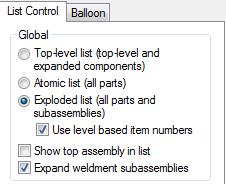
Next, I go to the List Control tab.
Here, you will select the type of list you want, in this case an “Exploded list”. Under the Global settings, change the settings to match those shown below.
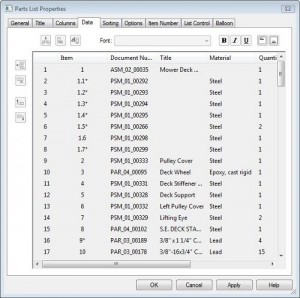
You can preview the results on the Data tab. Notice the indent item numbers for assembly number 1.
Summary
The new Parts List architecture has allowed the Solid Edge development team the ability to add a tremendous amount of user control to Parts List creation. For more information view the “Parts List” section found in the Solid Edge Help documents.
 John Pearson is a Senior Technical Trainer and Application Specialist at Designfusion. He has over 24 years’ experience in the CAD/CAM industry, is a Certified Adult Trainer and has taught evening CAD courses at colleges in Ontario. He is also a major contributor of articles on the Design Fusion blog.


