Solidworks: 5 Things to Do Before Every Flow Simulation Analysis
By Christopher Ma, Hawk Ridge Systems
CAD/CAM/CAE CAD Hawk Ridge Systems SolidWorksA few standard geometry checks can save hours of frustration in Solidworks Simulation.
Working in the Hawk Ridge Systems Analysis Services group, I’ve developed a to-do list before I start any Flow Simulation analysis. Performing the following five steps — before creating a new Flow Simulation study — tends to minimize headaches when you’ve already put hours and hours into an analysis:
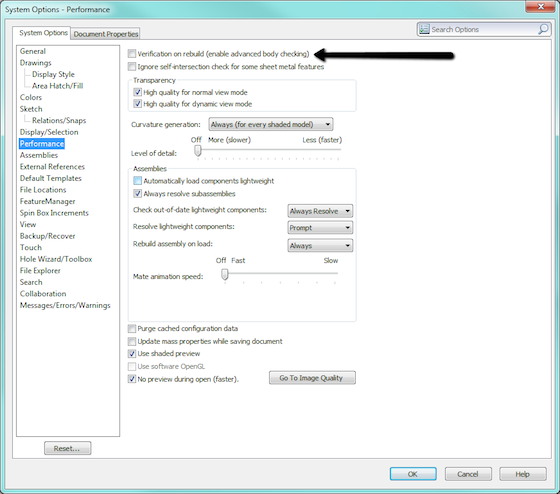
Force Rebuild with Verification on Rebuild (VOR) turned on

I tend to do this as soon as I open the file. I go to Tools > Options > System Options Tab > Performance Section > Verification on Rebuild checkbox. Make sure this is checked, exit out of the options and press CTRL-Q. Depending on the file, this may take a while.
This setting checks every feature against all existing faces and edges, not just adjacent faces and edges. When this option is turned on, features that cause invalid geometry fail. If any features fail, fix them now.
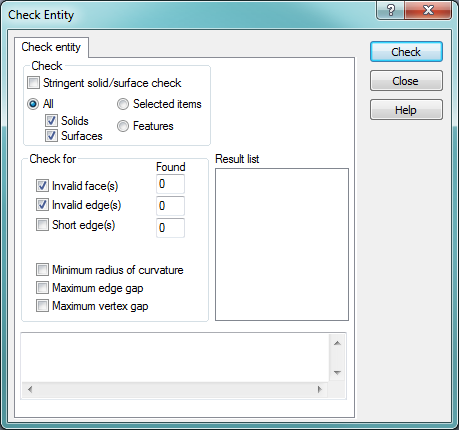
Check Entity
This is a really simple tool for checking for invalid faces and edges and is especially helpful when you have imported geometry. This tool can be found at the part or assembly level under Tools > Check.
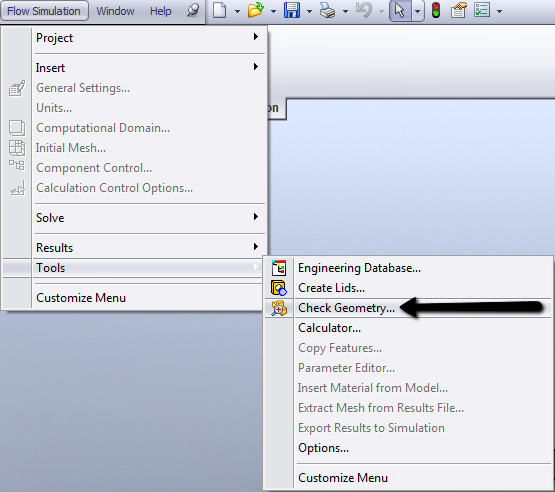
Flow Simulation’s Check Geometry
This is a great way to find out if you have any invalid contacts that Flow Simulation doesn’t like. Certain invalid contacts can be fixed by this tool, but it is a good idea to fix these yourself before proceeding any further.
This tool will also check if you have a fully enclosed fluid volume, something you are going to need if you are doing an internal analysis. This tool can be found with the Flow Simulation add-in turned on under Flow Simulation > Tools > Check Geometry.
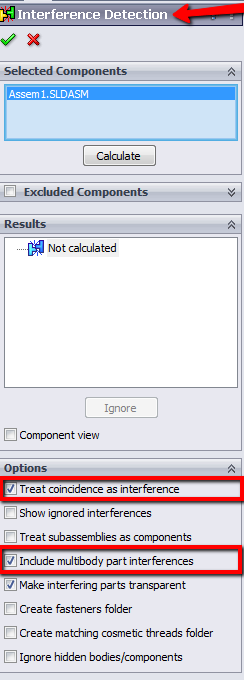
Interference Detection
Interference detection is a very useful tool found in your Evaluate tab on the Command Manager, or under Tools > Interference Detection (at the Assembly level). Flow Simulation is not as concerned with interference, but if you are doing heat conduction problems, it’s very important that the faces that you think are touching, are actually touching. This is where the “Treat coincidence as interference” checkbox comes in. Having this checkbox on will list, in addition to any material interferences, all sets of touching faces.
Also, a checkbox that should be on is the “Include multibody part interferences” (don’t want to forget those). This tool can be found in your Evaluate tab on the Command Manager, or under Tools > Interference Detection (at the Assembly level).
Import Diagnostics
If you use imported geometry (IGES, STEP, Parasolid, etc.), this tool is something you should already be familiar with. There are many times where I have seen customers import their geometry, start adding features, and then when they start to have problems, we find that their initial geometry was faulty. This ends up costing the customer a lot of time remaking their part; simply running the diagnostic tool in the beginning would have saved a lot of headaches.
If this finds any faulty faces or gaps, you can try to heal all; if this doesn’t fix it you may have to start deleting and patching faces manually. This tool can be found at the part level, under Tools > Import Diagnostics.
For more Flow Simulation and other Solidworks tips, check out HawkRidge Systems Blog
Christopher Ma is a Simulation Engineer at Hawk Ridge Systems with with 12 certifications, including SolidWorks Elite Applications Engineer. He also has a B.S. in Mechanical Engineering from UC Santa Barbara, and received his M.S. in Mechanical Engineering from UCLA.


