How to create an interactive presentation with Autodesk Showcase
By Sergio Duran, Applications Specialist - MFG, SolidCAD
CAD/CAM/CAE Autodesk Inventor Showcase SolidCADImport Inventor or nearly any 3D CAD file for stunning renders and presentations.
Autodesk Showcase real-time 3D presentation and rendering software allows you to create compelling, interactive sales and marketing presentations. Designs can be displayed with a high-degree of realism while allowing for the ability to view different variations of a product such as options or colour combinations.
So where does Showcase fit in your design process? Well, it’s a great, real-time validation tool when customers want to see multiple design variations. More importantly, you can ensure a positive impression with your customers by communicating designs with high-quality images, videos and storytelling features.
Since Showcase can import most any 3D CAD file format, before I go into the specifics of importing an Inventor model, let’s take a look at the general workflow applicable to all supported CAD file formats.
Beginning with the General Workflow
1. Create a new Scene by selecting a file to convert from its native 3D format into a usable format for Showcase.
2. Author the scene by:
a. Generating Behaviors (similar to Inventor’s 3D Constraints) which define a point of movement.
b. Generating the Alternatives, allowing the user to swap colours, change the position of the model and even change parts.
c. Setting the Environment by choosing the lighting style and selecting a realistic background that suits the product.
d. Generating the Story using snapshots, cinematic fly-bys and simple animation.
e. Using Shots to control the way you view your designs. Shots allow you to highlight and focus characteristics of the design.
3. Present it. Images can be saved using different formats such as JPEG, TIFF and BMP and videos can be created in common formats like AVI, MP4, Flash, etc.
Importing your Inventor Design to Showcase
If you’re using Inventor, the workflow is very easy. You can automatically create a Showcase Scene from an Inventor file, complete with Materials, Shots, Alternatives, Storyboard, and animated Constraints. Here are the steps for setting up Inventor and letting Showcase auto-generate the Behaviors and Alternatives:
1. Create a new Scene.
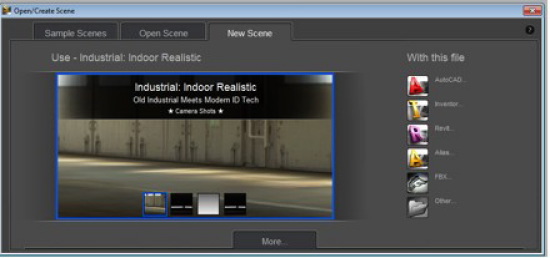
a. Start the new scene wizard by selecting “New” from the menu drop down.
The wizard also starts automatically when you first initialize Showcase.
b. There is an option to select a background at the start before the Model Type has been selected (Inventor model in our case). Click on “More” to bring up additional Environments.
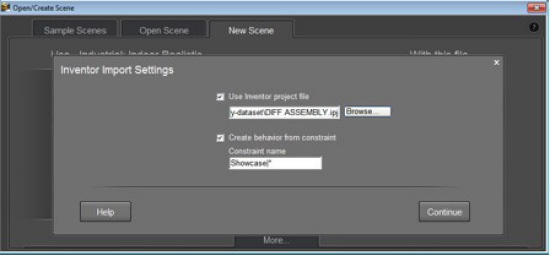
c. After selecting the Inventor Model type:
i. set the Project File so all links come in properly.
ii. choose the name of the constraints you want to convert to Behaviors.
d. press “Continue” and let it run. Showcase will begin converting the Inventor file to a Showcase Scene.
i. Properly named Inventor Constraints will convert to Showcase Behaviors.
ii. Inventor Positional Representations are converted directly into Showcase Alternatives. Sectional Views will come over as well.
iii. Inventor Design Views, which allow both color changes and different orientations, will also create Showcase Alternatives. Once the conversion is complete, Showcase will display each Alternative as an icon or Thumbnail.
Before (in Inventor)
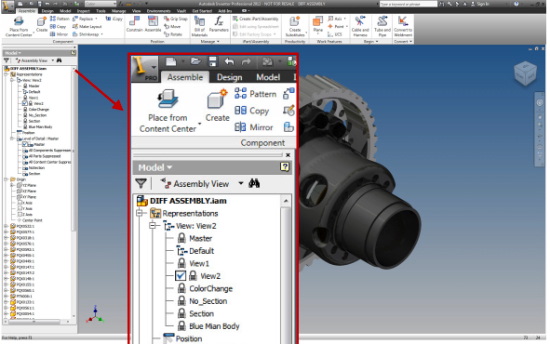
Note: You can see the different Design Views that exist in the Inventor model.
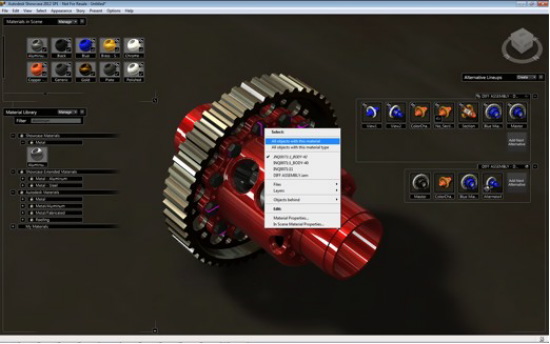
After (in Showcase)
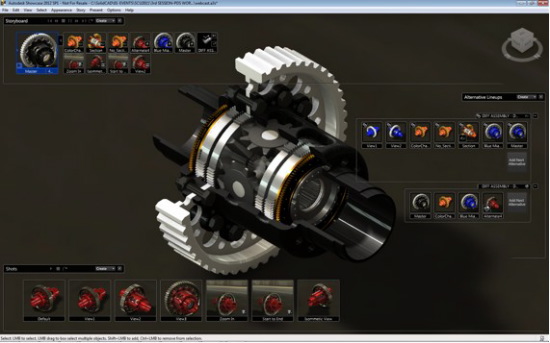
Note: Showcase brought in all Design Views and it can also bring in Positional Representations, which are not shown in this example.
2. Author the Scene.
a. Review the items that were auto-generated and adjust as desired
b. Test the Behaviors, which in most cases will have an animation pre-generated for you.
c. Establish an Environment to enhance the display of your product in the scene.
d. Add Lighting Effects.
e. Add in additional Alternatives.
f. Add additional Storyboard items as required.
g. Create Shots.
h. Check different photorealistic visual styles as well as non-photorealistic styles in order to pick and show your model with the desired representation and quality.
Tip: You can change the colour/material for all objects that are currently the same material by Right-Clicking on the model after selecting a face. Choose “All Objects with this Material” and select a new material from the material library.
3. Present it.
a. Since this is an interactive demonstration, a video will not be created; instead the engineer, designer or sales representative can simply save the file for use at a later time.
b. Keep in mind not all members of the collaborative team will have the full version of Showcase but the saved file can be run from the Showcase Viewer.
c. Open the model in the Showcase Viewer and show off the different styles and animations customers want to see.
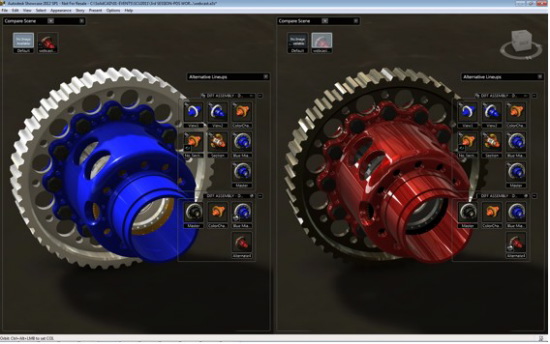
Tip: You can present two versions of the same product, or different products, side-by-side to allow for live comparison.
For more on Autodesk Showcase, register for SolidCAD’s webinar “Autodesk Showcase 2012” on March 8th, 2012 at 11:00 am EST.
 Sergio Duran is an Applications Specialist, MFG with Autodesk reseller, SolidCAD, who provides professional consulting, implementation, training and support services. An Autodesk Certified Implementation Expert and Trainer, Sergio specializes in Inventor advanced part and assembly modeling and Vault data management and product lifecycle management. He’s also an avid Autodesk Labs user who took part in evaluation of the technology preview of the Feature Recognition for Inventor and Photo Scene Editor (Project Photofly). Sergio holds his Bachelor of Mechanical Engineering from EAFIT University, Colombia, and is an accomplished Mechanical Designer.

